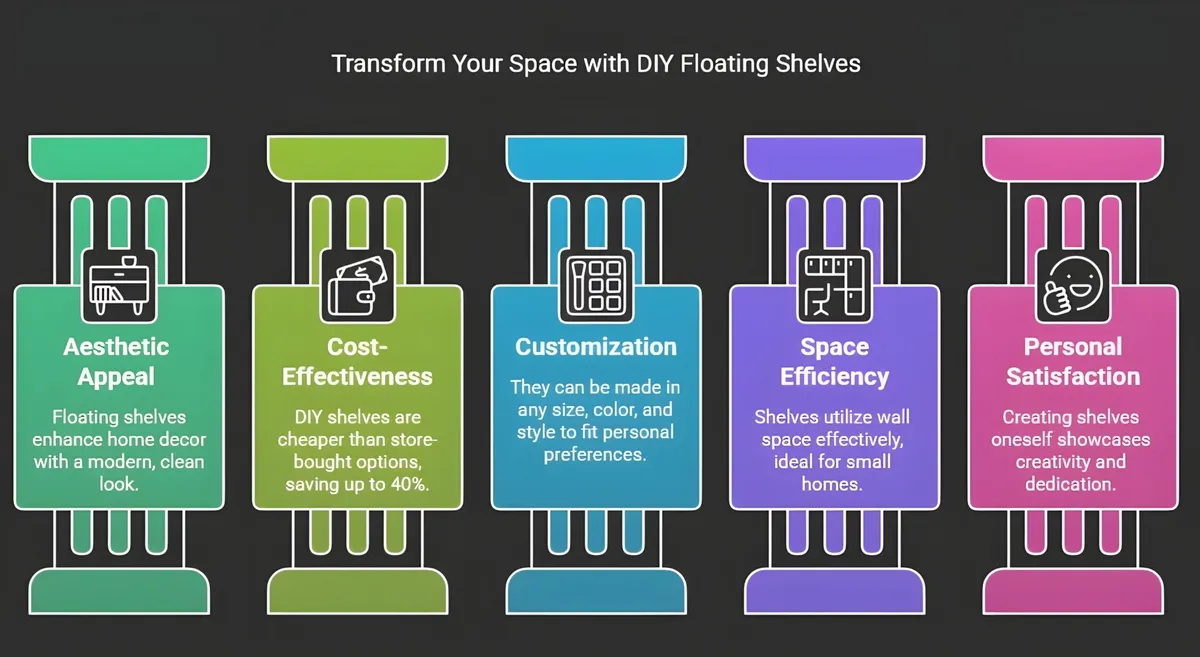
Everyone wants their home to look beautiful and neat, and that is why the trend of floating shelves in home decoration has increased a lot these days. DIY floating shelves are an easy and economical way to give your room a new and modern look. These shelves are installed on the wall in such a way that they seem as if they are floating in the air.
Their design is so special that they make any place stylish and attractive. You can install them in your living room, kitchen, or bedroom. The best part is that you do not need to spend a lot or have any special technical knowledge to make them. With just a little effort and the right materials, you can make something great with your own hands.
This project is also great for those who want to try something new and creative at home. Making DIY floating shelves is not only fun, but it also does not put a strain on your budget. If you have some experience working with wood, it will be even easier.
But even if you are doing something like this for the first time, there is no need to worry. We will explain each step to you in such an easy way that you will complete it without any hassle. So let’s take a step towards this new beginning of making your home more beautiful.
What is the point of DIY Floating Shelves?
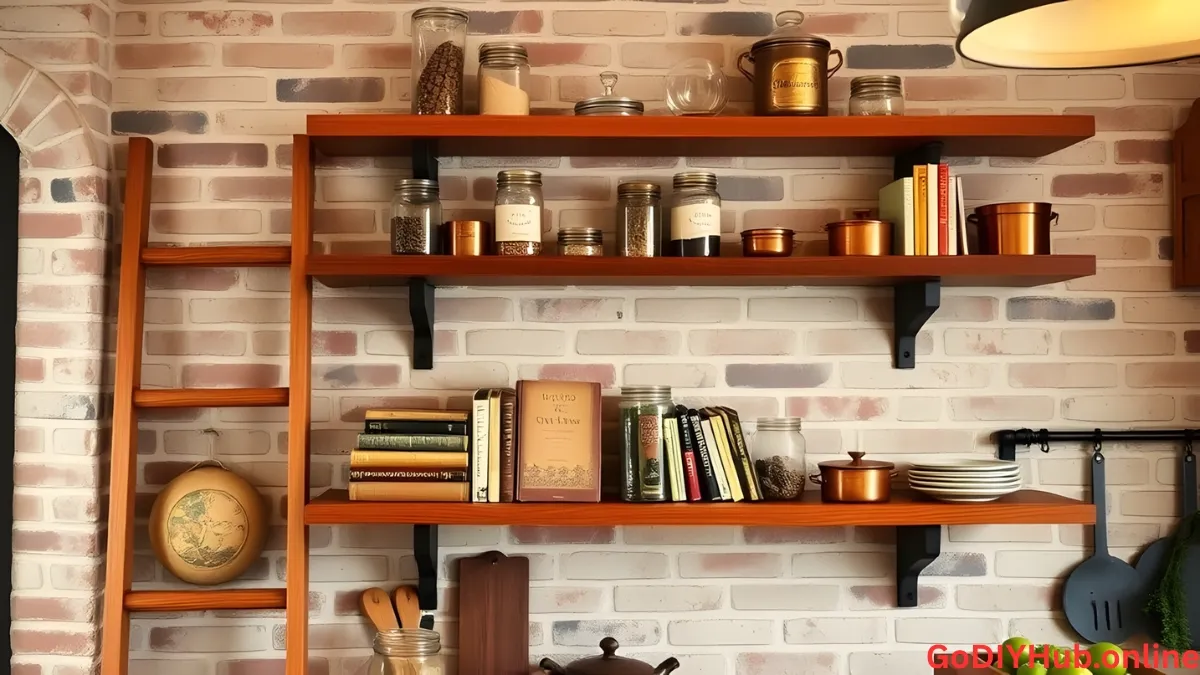
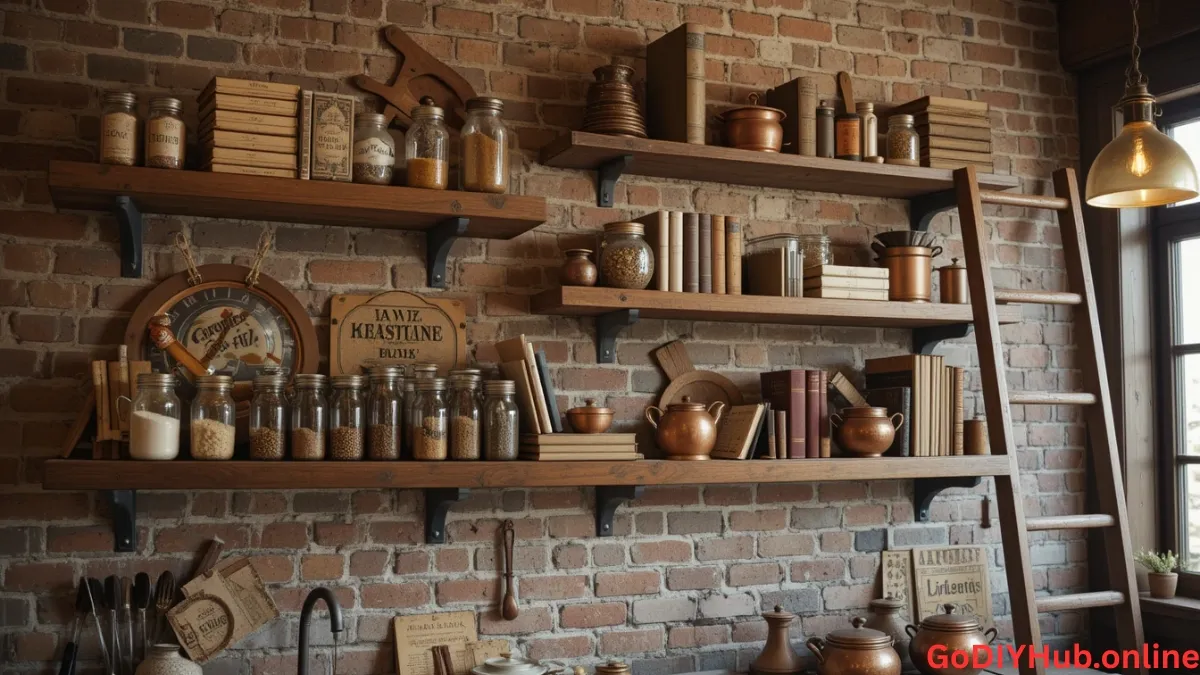
DIY Floating Shelves are shelves that are attached to the wall, but there is no support visible underneath them. This is why they appear light and floating in the air. Their look is quite clean and modern, which makes the home decor look even better. People use them to keep books, decorate decorative items, or organize everyday things. These are especially useful in small houses, as they save space and make proper use of the walls.
There are many types of shelves available in the market, but there are many advantages of making them in a DIY way. The biggest advantage is that you can make them in the size, color, and style of your choice. Apart from this, these are also cheaper than buying ready-made shelves.
According to a report, you can save up to 40% of expenses through DIY projects. Apart from this, when you make something yourself, your hard work and dedication are visible in it, which is rarely felt in the things available in the market.
Materials required to make floating shelves
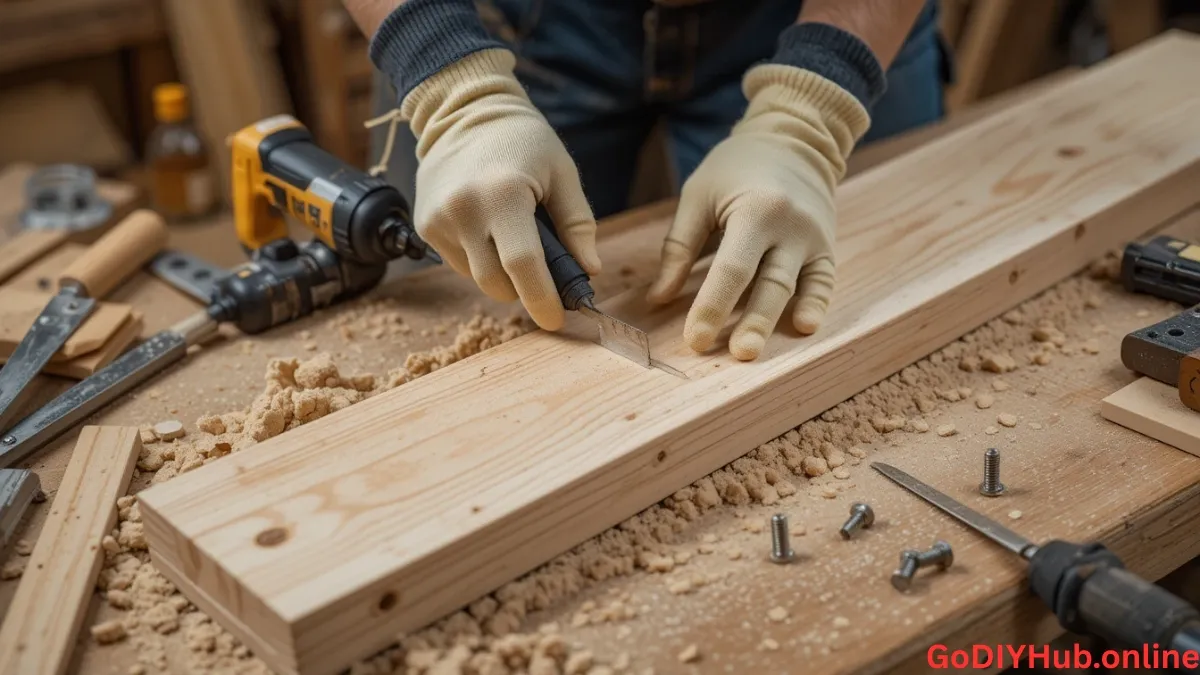
To start this DIY floating shelves project, you will need some basic things. First, take a thick piece of wood, which will form the main part of the shelf. Usually, 1-inch-thick wood is good. Apart from this, take small pieces of wood of 2×2 inches, which will be used as support on the wall. You will also need a drill machine, screws, measuring tape, pencil and sandpaper. Use paint or varnish to paint or varnish the shelf. All these things are easily available at any hardware store and are not very expensive either.
If you are making something yourself at home, it is very important to take care of safety. Wear gloves and safety glasses while cutting or drilling wood. These small precautions can save you from getting injured. The cost of this entire project depends on the size of your shelf, but usually, a good shelf can be made between Rs 600-1200.
How to make floating shelves
- Step 1: Choose the right location and measurements
First, decide where to place the shelf. Then use a measuring tape to measure the length and width of the wall and decide the size of the shelf you need. Make light markings on the wall with a pencil so that you have an idea of where the shelf will fit. The measurements must be exact because if they are wrong, the shelf may look crooked and leave unwanted marks on the wall.
- Step 2: Prepare the wood
Now, cut the wood to the desired size. If you do not have a wood-cutting tool, you can get it cut from a shop. After cutting, rub the wood well with sandpaper so that the edges become smooth and there is no risk of injury. This step will help in giving a professional finish to the shelf.
- Step 3: Prepare the supports
Now make a sturdy frame out of 2×2-inch wood, which will be mounted on the wall and support the shelf. Fix it firmly to the wall with screws. Use a leveler to keep the frame straight; otherwise, the shelf may look crooked.
- Step 4: Install the shelf
Now, place the large wooden piece on top of the frame and check the correct fitting. Then screw it in from below to secure it properly. Tighten the screws so that the shelf remains strong. Shake it slightly to check if it is loose.
- Step 5: Painting and Finishing
Paint the shelf in the color of your choice or apply varnish, so that it looks even better. If you want, you can also apply good-quality sunmica. When the paint dries completely, you can keep your favorite things on it like books, decorative items, or small plants. Now your DIY floating shelf is completely ready.

Some important tips and precautions
- Choose strong wood, such as pine or rosewood, so it can support more weight.
- Before drilling the wall, check that there is no electrical wire there.
- Do not place excessive weight on the shelf, or it may collapse.
- If you are facing difficulty in drilling, seek help from an experienced person.
- Keep it away from the reach of children, so that no accidents occur.
You can use these shelves to keep photo frames or decorative items in your living room. It is also a great option for storing spices or small utensils in the kitchen. It also looks great for keeping books, lamps, or small plants in the bedroom. It is a great storage solution in small homes.
DIY Floating Shelves not only give your home a modern look, but also show how creative and hardworking you are. This project can be easily completed at a low cost, and it gives a unique personal touch to your home. So why wait? Start this project today and give a new look to your home.


