
Candles are no longer used only when the light goes out, but they have also become a great way to decorate the house and make the atmosphere special. Nowadays, many types of candles are available on the market, but when you make a candle with your own hands, it is a different kind of experience. This can also be a fun hobby, and with this, you can make candles of your choice of color, shape, and fragrance. DIY Candles are as easy to make as they are budget-friendly. For this, you just need some basic materials and a little time.
In this article, we will tell you in simple language how you can make candles at home by yourself. This process is so simple that any student of the 10th class can easily understand it and try it. We will explain each step very clearly, so that you do not find anything confusing and you can make your first candle without any problem.
Along with this, we will also tell you some tips and tricks that will make this work more fun. So let’s start this creative journey and see how fun and easy candle making can be.
Materials needed for DIY Candles making
Before starting, you will have to gather some essential things to make the candles. First of all, you need wax, which is the main part of the candle. You can use paraffin wax, soy wax, or beeswax, as per you choice. Although paraffin wax is the most easily available and is also cheaper than other waxes. Apart from this, you need a wick, which burns the candle. You can use cotton thread, or you can also take a readymade wick.
After this, you need a container in which you will pour the melted wax. This container can be a glass jar, an old teacup, or even a small metal box. Now, if you want to make your candle colorful and fragrant, then you can also buy special colors and fragrance oils for candles.
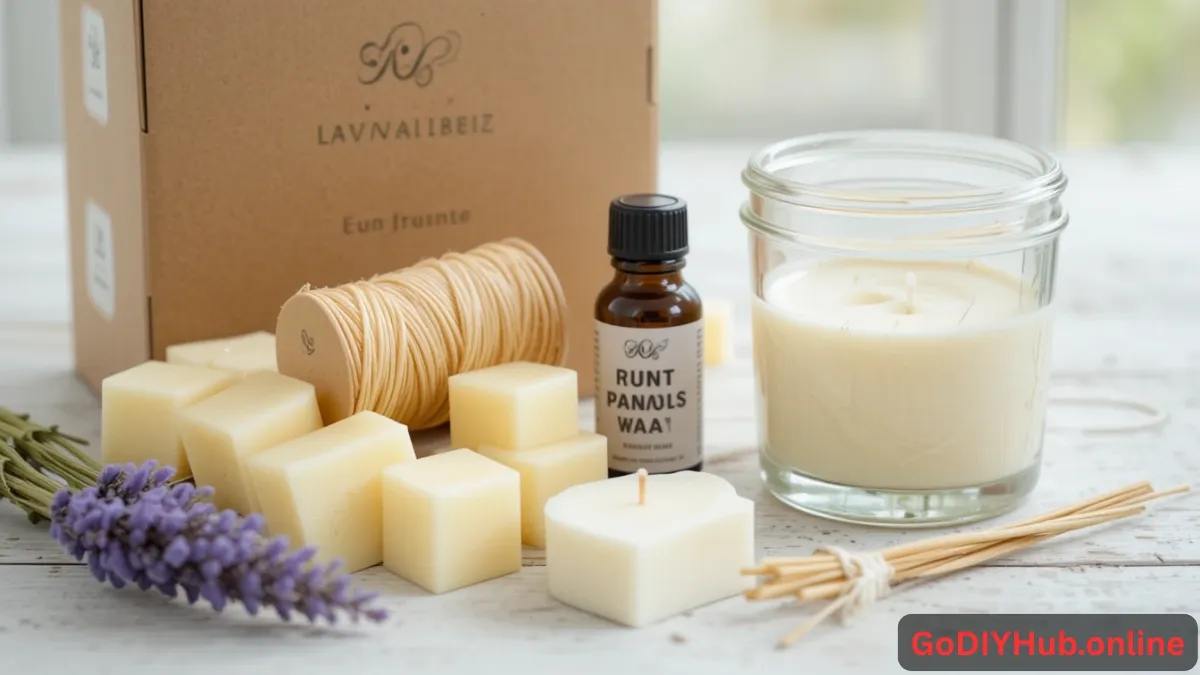
These are not necessary, but they will make your candle a little special. The last thing you need is an old pot or double boiler in which the wax can be melted easily. Keep all the things ready in advance, otherwise there may be a mess in between, and the candle will not be made as you want.
An easy way to make candles
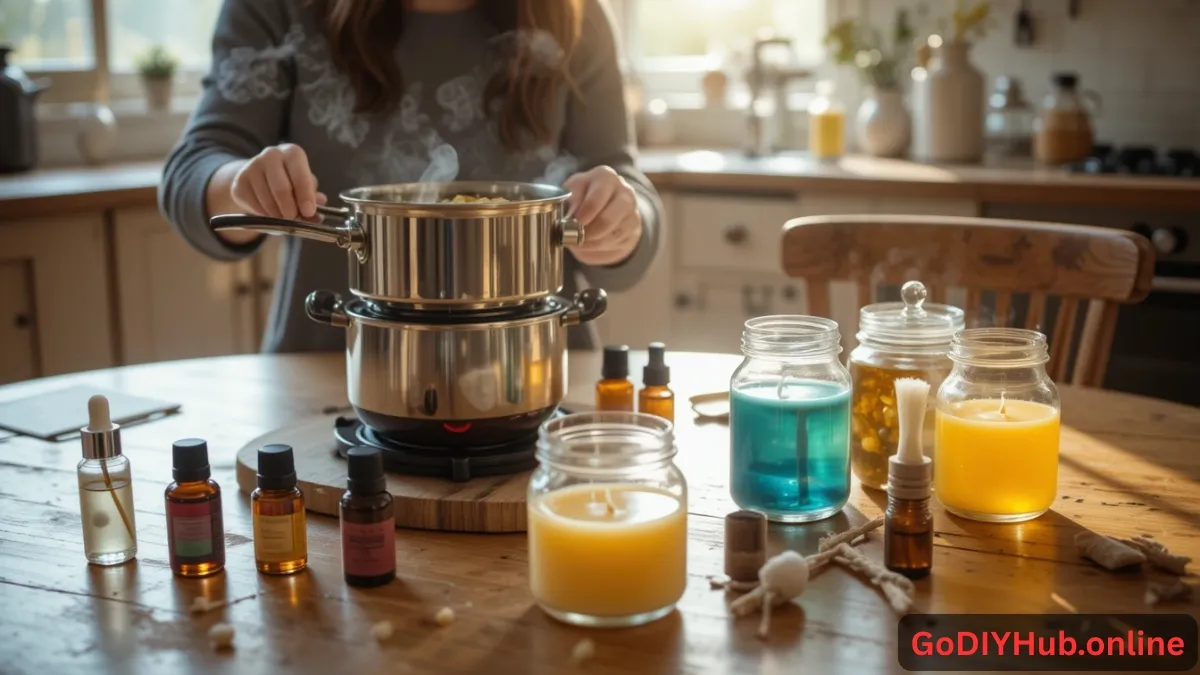
- Step 1: Melting the wax
First, break the wax into small pieces so that it melts quickly. Now heat some water in a large vessel and place a small vessel containing wax inside it – this is a double boiler. Keep the gas flame low and melt the wax by stirring it slowly. This entire process can take 10 to 15 minutes. Be careful not to heat the wax too much, otherwise it may burn or its quality may deteriorate.
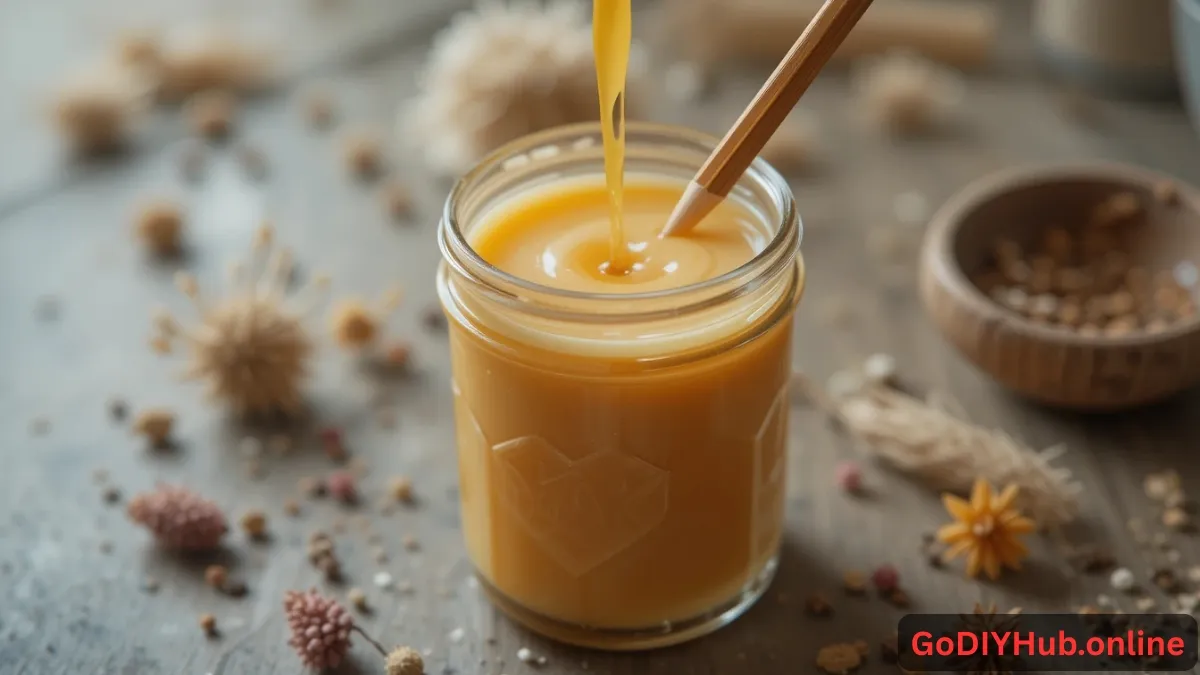
- Step 2: Preparing the Wick
While the wax is melting, set the wick in the container. Place the wick in the center of the container and glue the bottom of the wick with glue. To keep the wick straight from the top, take a pencil or chopstick, place it on the top of the container, and tie the wick to it so that it does not move from its place.
- Step 3: Adding colour and fragrance
When the wax melts completely, turn off the gas. Now add the colour of your choice to it – just a few drops will be enough. Adding more may make the colour too dark. After t”A high-resolution image of a finished DIY candle burning brightly in a glass jar, with a smooth wax surface, a subtle yellow flame, and a background of a cozy living room with warm lighting.”
his, add 10-15 drops of any fragrance oil to it and mix it well. If you want to make a scented candle, then do this step. When everything is mixed well, let the wax cool down a little.
- Step 4: Pouring the wax
Now, when the wax cools down a bit, slowly pour it into the container. Keep in mind that while pouring the wax, fill the container only up to 90% because the wax shrinks a little as it cools down. Then leave the container like this for 4-5 hours so that the candle sets well. Do not move it during this time, or else the surface may get damaged.
- Step 5: Putting the finishing touches
When the wax has completely set, separate the wick from the pencil at the top and cut it, leaving 1-2 cm long. If there is any crack or dent at the top, fix it by adding some more melted wax. Now your DIY candle is ready! Just light it and feel proud of your work.
Some useful tips and precautions
Although DIY Candle making is easy, there are a few things to keep in mind. Never melt wax directly on gas, or else it may burn. Always use a double boiler; this is the safest way. If there are small children in the house, keep them away from this process as there is a risk of burns from hot wax. And if you are making it for the first time, start with a small amount of wax; this will help you understand the process well.
You can also experiment with different colours and scents, scents like lemon, lavender, or vanilla are some of the most popular. You can also add dried flowers or glitter to decorate your candle, but make sure they are not too close to the wick, or it may cause problems while burning.
Benefits of DIY Candle Making
Making candles with your own hands is not just a time pass or a hobby, but it has many benefits. It keeps your mind calm, activates your creative side, and you learn something new.
Apart from this, you can also gift these candles to your friends or relatives, that too without spending much. These are cheaper than the expensive candles available in the market, and you can make something different every time, with the design and fragrance you want.
So all in all, DIY candle making is not only easy and fun, but also very useful. With a little effort and the right materials, you can make amazing candles at home. The next time you feel like trying something new, give candle making a try. Try making your first candle and let us know how you feel.


